|
Hey guys, Today I am reviewing a hair product. I try to look after my hair the best I can, I have long, fairly thick hair. I am a sucker for hair products that repair/moisturiser my hair. I do have my hair dyed in the style of Ombré which if you don't look after your hair can cause damage to the ends. I like to make sure my hair is healthy. So if anyone has any products they recommend leave me a comment down below. Let's jump into the review. I purchased Tony & Guys Nourish Reconstruction Mask from Asda for £7 and since have purchased it from Superdrug, Feel Unique you can get this product at a lot of different shops all for around £7, You get 200ml which is a really good size. Even with my long hair it has done 8 treatments. So I use this treatment in place of conditioner and leave it on my hair a little longer their recommended 3-5 minutes. Usually while my St Tropez In Shower Gradual Tanner Takes. I have even on occasion left it on for a few hours and then washed it off ( this is when I have had the best results ). This hair mask does exactly as it says it will and completely nourishes my hair and it feels so soft whenever I use it which is once a week. The scent is a beautiful, gentle floral scent and it stays with you for a good while after washing which I love! When brushing after washing it detangles so easily and I can even run my fingers through my hair before brushing which when you have long hair is not a easy task! The consistency of the product is thicker than regular conditioner. So I use slightly more than conditioner and focus from my mid length to the tips ( mainly where my hair has been damaged with bleach ) although my hair is not insanely damaged it is doing wonders for my hair for a £7 mask. My hair after using is instantly softer, it feels nourished and strong. It looks and feels healthier. I have people commenting on how gorgeous it looks. Trying to touch it because its shiny. It doesn't leave my hair greasy or feeling like I have used to much product. My hair feels light and soft. When I style it, you can do the elasticity test and there is no breakage. So if you are on a budget and want to try and put some life back into your hair then this is the mask for you. If you just want to help your hair along with an extra rich condition now and then like myself then I highly recommend. I give this mask a solid 9/10 it only doesn't get full marks because I have tried a few other masks which did remarkable things for my hair such as Macadamias Ultra Rich Moisture Mask ( Full review coming soon ). But the packaging is sleek and smart. The product smells good & works really well. For the price it is an amazing product. The only advice would be that if you get oily roots fairly easily then I would avoid going up further than mid length as it may be to much for your hair. Until Next Time, Kayleigh Lisa 💞 
0 Comments
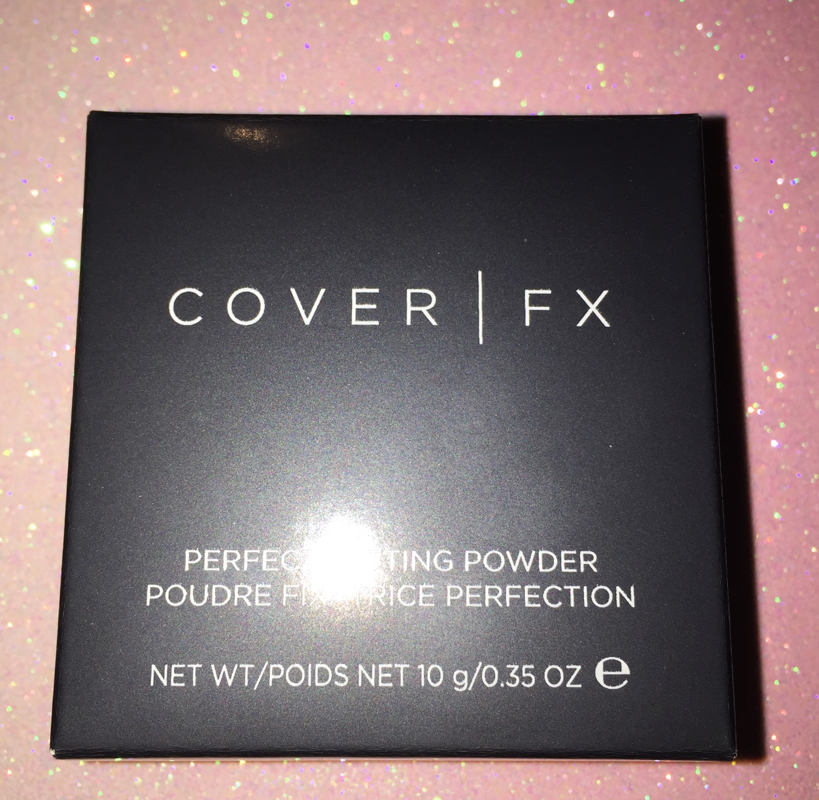
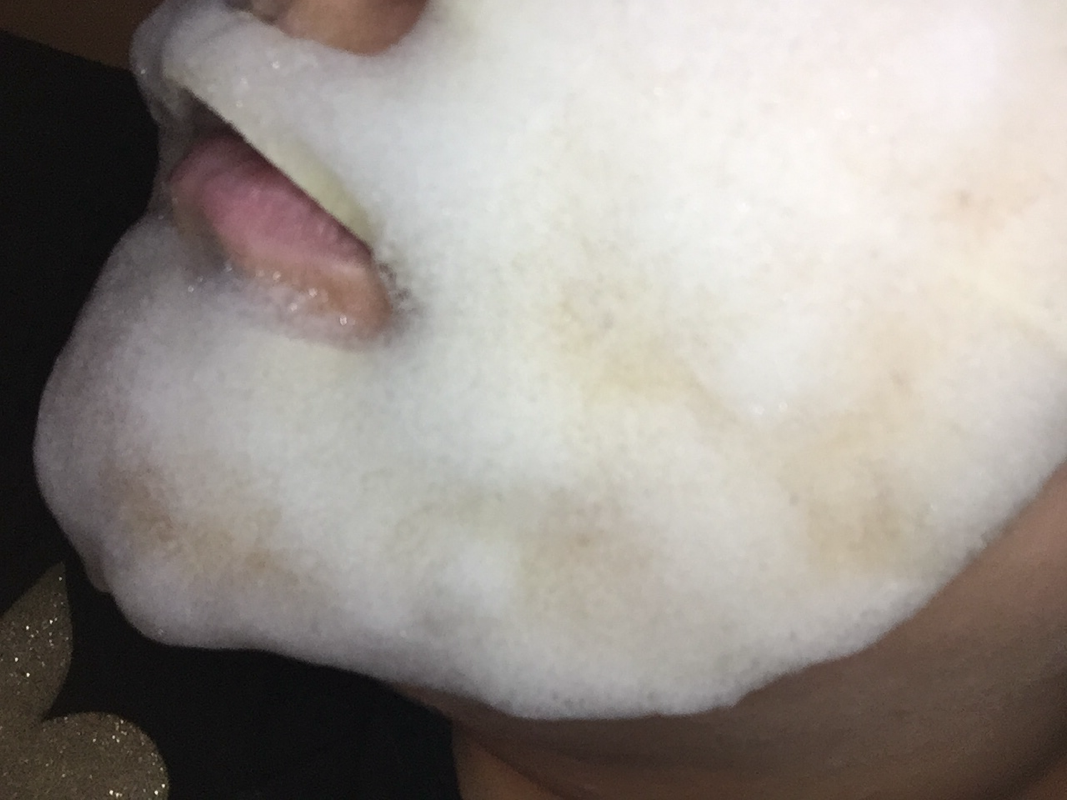
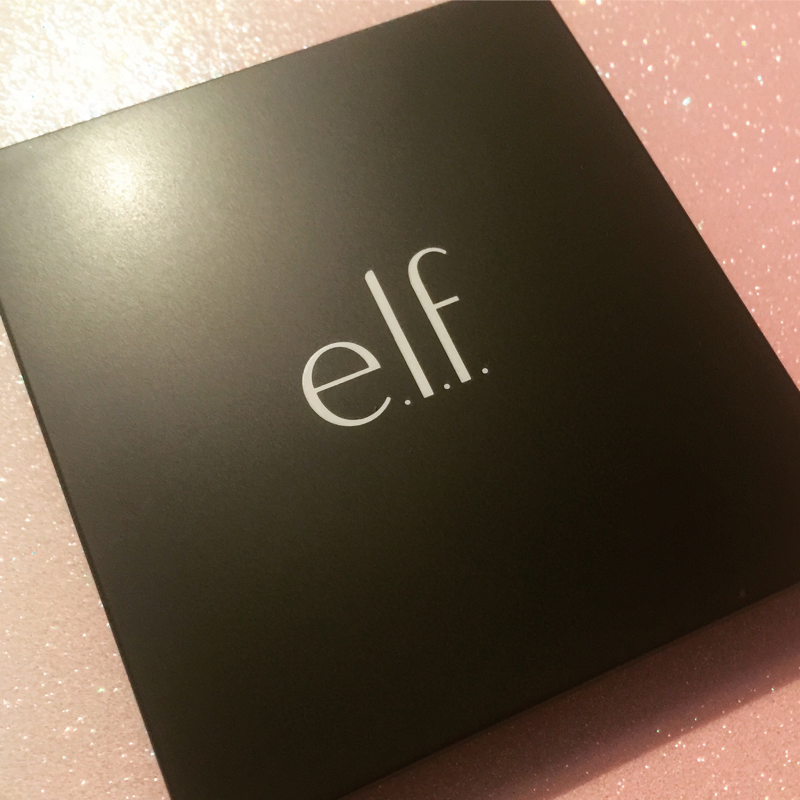
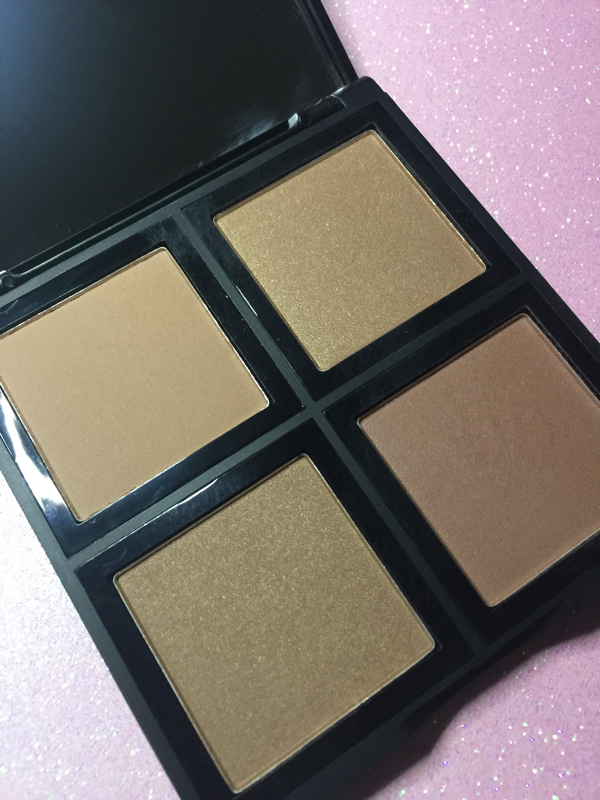
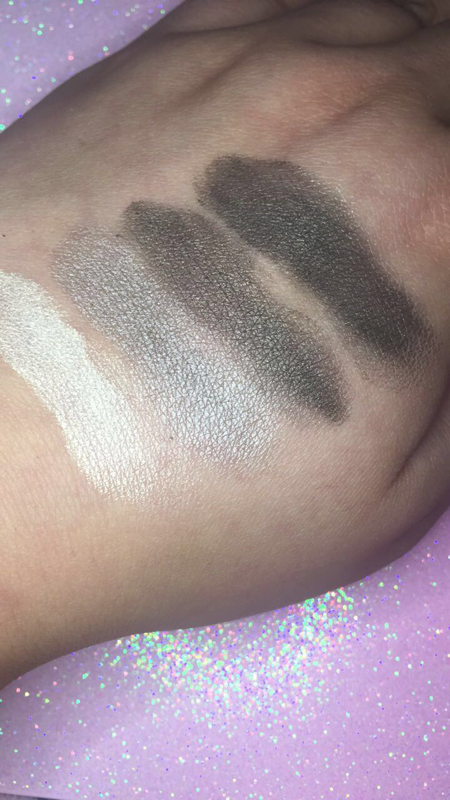
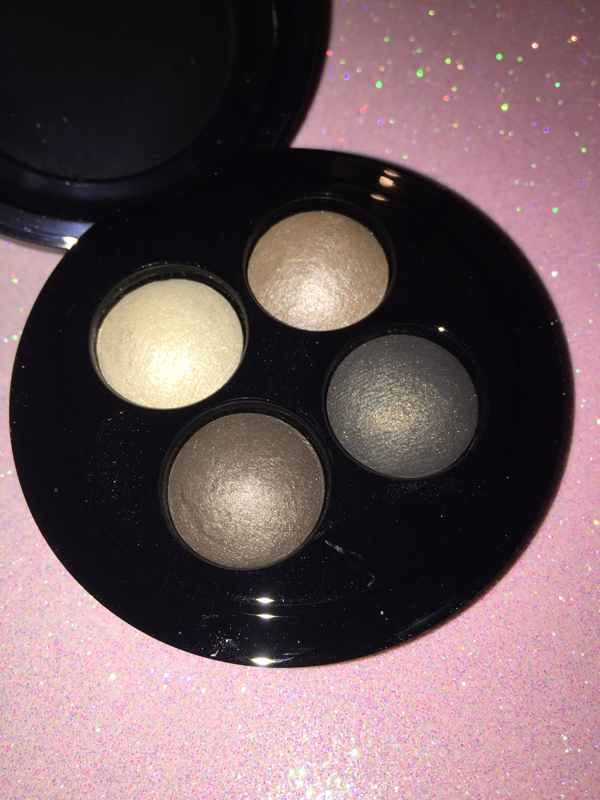
Hey Guys! Today's review is on one of my current favourite products! I purchased Cover Fx's Perfect Setting Powder from BeautyBay for £28. I have been using it now for a couple of weeks in turn with a few other setting powders and I have to say that this is hands down my favourite! You can get the powder in 2 different shades; translucent light and translucent dark. It does have a guide that 0-60 should wear light and 60-125 should use deep, this is set in their own shade range. You can use websites to translate your foundation colour to find out which would be best for you, if your like me who sits fairly in the middle. I use this mainly to set my face and to bake my under eyes. I take my powder brush and dip it into the powder, I tap of the excess and then sweep the brush over my face to set my make up. I also pack the powder under my eye to set & bake my foundation and concealer. This powder gets a high 9/10 and I highly recommend. It is finely milled powder and creates a flawless/airbrushed appearance. It helps set my under eye perfect minimising creasing and fine lines and without making my make up look "cakey". I like that it doesn't have talc in like most powders so it really does have that translucent effect which lasts all day. It is also perfect for taking photo's as it doesn't leave a flashback or white cast over the face. The packaging is okay, nothing special but I do like the there is a second plastic lip inside which clips over keeping the product in. Until Next Time, Kayleigh Lisa ♡ Hey Guys, So if there is one thing that I am loving at the moment it is masks, So when I saw the Oops Bubble Sheet Mask's by Berrisom which is a Korean brand. One thing that Korea know is skincare. I purchased the mask's from BeautyBay. They where £4 each. 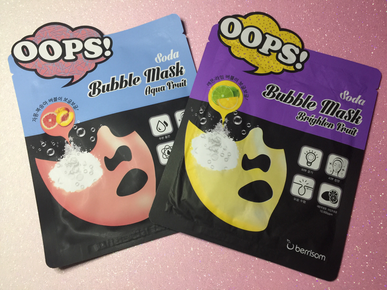 One thing different about these sheet mask's are that they don't cover the whole of the face. The mask focuses specifically on the nose, cheeks and chin area. Which I don't mind as my forehead isn't a problem area. As soon as you take the mask out of the packaging, you can feel that it's wet and that is the carbonated water on the mask. You smooth the mask over the face making sure it fits well and is smoothed out flat to the skin. The mask then starts to foam, and foam and foam some more! The instructions when it comes to removing the mask are to pat the excess serum into the face. This is where the mask starts to go downhill for me. Instead of leaving my skin feeling smooth or hydrated like most sheet masks, my skin felt extremely sticky and the bubbles where still very present. I decided to wash the excess off and get rid of the sticky feeling as I am not a fan of tacky skin. This mask boasted to clear my skin, to give me a brighter complexion and help produce new skill cells. So my verdict, I would give this mask a 4/10 . Don't get me wrong it is very gimmicky and a fun mask. Probably ideal for a teenagers sleep over. My skin felt no different, it looked no different and instead just left a very sticky residue all over my face which took a good while to wash off. In general I wouldn't recommend this mask if your looking to make a difference to your face. I would however recommend it if you just want something fun & to have a bit of a laugh. But it isn't a mask that I will be repurchasing. Until Next Time, Kayleigh Lisa ❤ Bronzer is such a huge part of most peoples make up kit and one of the most used items in the summer months. Bronzer is such a versatile product so whether your using it to fake a tan, for assistance with an eye look or are looking to warm your complexion up there are still some common bronzer mistakes that we all make! So if you would like to know how to get that natural bronzed goddess look and not a muddy patchy mess then keep on reading! The first mistake a lot of people make is choosing a shade that is too orange. You want to try and swatch as many as you can, to find the shade that matches what you would naturally tan too. The second mistake a lot of people make is picking a bronzer that has to much shimmer. Picking a bronzer with shimmer can make your face look sweaty and unattractive. You need to remember that bronzer is all about giving your complexion warmth. Less is more, Remember it's easier to add colour than to take it away. Lightly layer your bronzer until you reach your desired coverage. Applying it all over, make sure you don't slather bronzer all over your face but instead just bronze areas that the sun would naturally hit such as; Cheekbones, bridge of the nose, the outer side of the face. Match your face to your body! Having a beautifully bronzed face is amazing until you get down to your shoulders & chest and none of it matches up. So remember to gently brush over the top of your shoulders, between your breasts and anywhere else that sun naturally hits. Account for your skin type. Make sure you account for your skin type when choosing a bronzer. Those with oily skin will benefits most from powder and those with dry skin will be able to achieve a natural dewy look with a cream bronzer. I don't recommend a shimmer but if you want to use one then it's best to use at night & never use it on your forehead. While all bronzer is brown, there are undertones that you should look for, Pale skin tones should look for a warm/pink undertone. Medium skin tones should look for a peachy undertone. Olive skin tones will should look for a slightly terracotta shade and deep skin tones will find red undertones flattering. Take the lighting into account. Always try to apply your bronzer in natural light or the brightest room in the house. This will help you make sure that the bronzer isn't to harsh or muddy. You can double check this by taking a picture in both natural light and with the flash on. I hope that these Do's and Don't help you to achieve a flawless bronzed summer look! Until Next Time, Kayleigh Lisa 💗 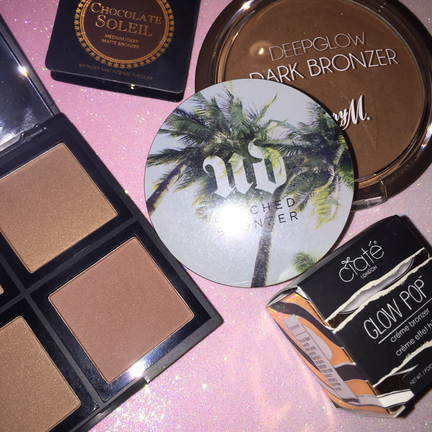 Hey Guys! Today I have another exciting review. St Tropez gradual tan in shower tanner. Available from St Tropez website, Superdrug, BeautyBay and many other retailers. When I was younger I used to tan in a lot of different ways from sunbeds to instant tan, gradual tanner and spray tans, however the last few years I haven't really used any tanning products. I saw Laura Lee use a similar ;product on one of her YouTube videos & I decided to give it a go. However I wanted to use St Tropez as they have always been a great self tanner with natural results. I think sometimes you pay for quality when it comes to tanning products. This product seemed far to good to be true when I first saw it. To turn the shower off and just use a 2 pence piece, massage in circular motions into the skin. It gives you a slight white cream effect when applying which helps you to see where you have been. You then wait for 3 minutes ( which I find really hard to judge the time ) then simply pop the shower back on and rinse off. Making sure to pat yourself dry not rub. So the instruction are fairly simple and it really doesn't take long to do compared to other ways of tanning. I went to sleep after having my shower and I couldn't believe it when I woke up! It had worked so well, I had a beautifully natural light brown tan, it looked flawless, no streaks or missing gaps. It was even and so natural. I was really happy with the results. but I decided I would like to be slightly darker so when the light tube had finished I purchased medium. Again the results where just as amazing, natural, flawless and no uneven areas. It was just quite a bit darker and perfect for my skin tone. So I will definitely be sticking with medium. I have now got into a routine with applying this. On the directions it says to apply it 3 days in a row. I however have changed it slightly. I apply it all over the body one day, the following day I do just my arm, the next day just my legs and then back to all over, followed by a day of rest. This is just my personal routine and what is working best for me and giving me the best results, which I am happy with. I do recommend however starting with the light one. It is a good one to start with just to find your feet. For you to work out how dark you would like to be, to get used to the application and how often you need to apply it. This gradual tanner really doesn't have an awful smell with it like some tanning products can. There is a light scent but it is fairly pleasant. When using this my skin feels moisturised as well which I love! Over all I would highly recommend this to everyone! Whether you aren't somebody that uses fake tan but would like to experiment, this is definitely the one to try, it is so user friendly, or whether you are a tanning fanatic that likes to have a sun kissed look. It get's a full 10/10. The only advice I would give is to make sure you are exfoliating regularly especially those area's that fake tan can cling to, (the elbows, knees, knuckles, heels so on.) I also use St Tropez Tan Enhancing Moisturiser which helps to prolong the tan and reduces the tan breaking up and improves fading. This is £10 available from the St Tropez website, Superdrug, BeautyBay and many other retailers. I will leave some picture down below, with the captions so you can see how the tan progressed. Until Next Time, Kayleigh Lisa ♡ Hey Guys, Today I have something so exciting to share with you. The extremely popular new Morphe palette's. They have 25 shades in them and come in 2 different varieties either the 25a or 25b, The 25a is Copper spice and has a mixture of browns, coppers and taupe colours in both foil and matte shadows. I however went for the 25b palette which is a again a mixture of both foil and matte shadows in both warm and cool shades. The shade range is different and has slightly darker shades from browns to purples. I am a huge fan of the packaging, I love being able to see the different shades in the palette through its see through lid, I feel like since I can see the different shades I have continually reached for the palette for eye looks. I love that the palette and eyeshadows are square but that's just a personal preference. 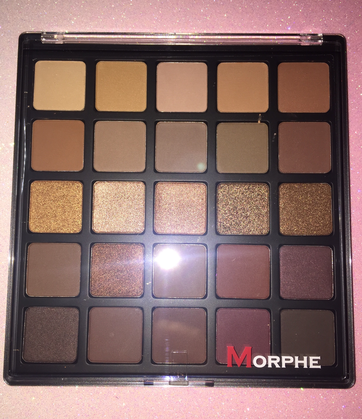 There are 25 eyeshadows hence the name 25b. The pan size is 1" which is a great size. These eyeshadows are highly pigmented, when I say highly I mean insanely pigmented. The formula however is really easy to blend and to get some really gorgeous eye looks. I like both the foil and the matte formula, however the foil shadows have a very intense colour pay off which is absolutely beautiful and blinding. For me they steal the show. I have worn this palette a few times now and the eyeshadow is long lasting, it looked just as perfect at the end of the day as when I applied it. I use eyeshadow primer and these definitely didn't crease or smudge. They stayed in place and there was hardly any fall out when picking up the product and applying. This palette gives you the opportunity to create so many different looks, which I absolutely love! There are so many possibilities and that's a huge selling point for me. The palette is 6inches in length and width, so it's a nice size and would be perfect to travel with especially to take on holiday because of the different looks you can create as well as being so compact. I would give this palette a full 10/10 it really is a perfect palette from the different shades , the formula and longevity of the product. The shimmers stole the show for me, they are absolutely gorgeous! The price point is £19 on Beautybay or you can get it directly from Morphe in America for $17.99 but you do have to pay shipping and taxes from America. I cant wait to keep creating gorgeous looks with this palette. Let me know what you think down below. Until Next Time, Kayleigh Lisa 💕 Hey Beauties! I am so excited to be reviewing a company that are fairly new to the UK. E.L.F which stands for Eyes, Lips, Face ( which I think is a great name!) has recently launched in the UK retailing only at Superdrug both in store and online. As soon as I found out it was being sold in the UK, I went and purchased a few items so I could review them on here for you guys! The first item I have tested out is the Studio Bronzer Palette in the Bronzed Beauty quad. It retails for £7.50. There is also another bronzing palette with darker shades under the name Deep bronzer. This quad has 2 shimmer shades and 2 matte shades. It has a mixture of both warm and cool tones. I have olive skin, with slight yellow undertones and a medium tan. All of these shades work for me, I personally don't just use one, I like to mix and match and make sure that it blends well with my contour. I do like how you are able to customize your bronzer and achieve different looks with the same palette. Perfect to take on holiday or when your travelling. This palette could be used as a contouring palette for those with lighter skin tones. I think if you are above a NC35/40 then this palette may not work for you and could make your skin looking slightly muddy. The formula seems to be very good, the shades are buttery and easy to use, they aren't crazy pigmented and are in face a little sheer, I prefer this as they are extremely buildable and you can work with them and blend them to suit your needs. I have worn this palette on several different occasions and every time it has last the whole day/night. Over all I would give this palette a 7/10. For the price you cant really go wrong, but it isn't one of my favourite, go to bronzers. I like the packaging and that is compact and perfect to travel with. If your after a reasonably priced palette to achieve different bronzed looks then I recommend this one! Until Next Time Kayleigh Lisa ♡ Hey Guys, Today I am going to be reviewing a birthday present I received from a very good friend indeed, who knows me very well! It's the MAC Mineralized Eyeshadow's X4, These are available from the MAC website & retails for £34 , There are 4 different sets; A Glimmer Of Gold, A Harvest Of Greens, A Medley Of Mauves and Posh Pedigree, which is the set that I have. The packaging like all of MAC's packaging is sleek and professional, I am a huge fan of how it looks, it feels heavy and expensive when you have it in your hand. 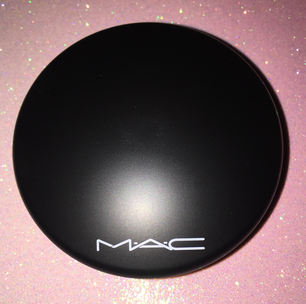 The 4 eyeshadows in Posh Pedigree are; A deep olive green, White lemon, Dirty grey and A charcoal green/grey. This is a perfect little set to create a smoky eye. Because it is so compact it would be perfect for travelling with and creating some simple smoky looks. The eyeshadows are so buttery and soft, they blend very well and can be built up to create a really dramatic look. If you use some Fix+ on your brush before grabbing your product it really makes it pop. Making it very pigmented and really pop on the eyelid. The eyeshadows are long lasting and stay looking fresh all day and night. They can crease if you don't use some eyeshadow primer, but this is the same with many eyeshadows and you should be using a primer before applying your eyeshadow. There is a small amount of fall out when you pick the product up with your brush, but a simple tap on the side helps the loose powder to fall off the brush. Over all I would give this product a 8/10 just for the fall out and the price point. But if you are after a gorgeous quad of colours, from a luxury brand, that can give you a beautiful smoky eye then this product is for you. Until Next Time, Kayleigh ♥
Hey Guys! So let's be honest the worst part of make up is cleaning your make up brusher! It's a boring chore that we have to do! So as soon as this Real techniques brush cleaner came out I had to get it. I purchased this from Asda but its available all over the internet and it retails for around £7.49. I believe that great make up application starts with clean brushes and tools! This cleanser is a gel and a little really does go a long way. You need less then a pea size amount per brush. It removes all make up, and gives it a deep clean, it gets right into the centre of your bristles and eliminates all traces of make up. When using it I simply wet the brushes before applying a small amount of cleanser and gently rubbing the cleanser into the brushes, before gently moving the brushes up and down on a cleansing plate. I then rinse all of the cleanser out which has usually changed colour to match the make up that it is removing. I put the bristles into the shape of the brush and then lay them down making sure they maintain their shape and allow them to dry, Since using this it has cut my cleaning time dramatically and makes my brushes feel brand new each time I use the cleanser. It is quick and easy to use, their are online tutorials on how to use the cleanser on the real techniques website. I give this product a 9/10. I love the fragrance of the cleanser although it may put a few people off. I love quick and easy it is to use, how a little product goes a long way and I really love how my brushes feel brand new after every use. The only downside is that it doesn't clean beauty blenders and similar sponges.But all in all if your after a brush cleaner and want to half the time you spend cleaning your brushes then this product is for you! Until Next Time, Kayleigh ♥ 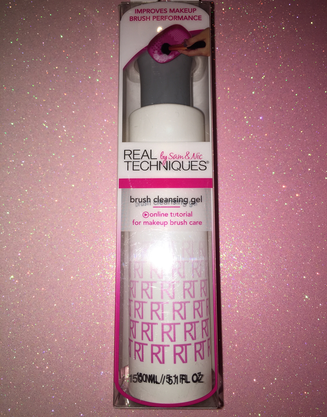 Hey Guys, I am so excited to be tying a new brand out and in the form of a new mask. Before I jump straight into my glowing review of this treatment, please do not use this mask if you are allergic to bee stings! Also if you have sensitive skin I would do a patch test 24 hours before you wish to try this mask. I did this by just applying a small amount to my jaw line, I left it for 30 minutes before washing off. This mask retails for £9.95, however at the time of posting it is on special at Superdrug for £4.95. Now we have the boring part out of the way, we can jump straight into my review! So how does it work? This gel mask contains bee venom with 3D express lifting effect technology. Which promises to smooth your wrinkles and firm your skin for the appearance of a more lifted facial contour. Like botox in a bottle?! The bee venom increases your blood circulation giving the effect of a plumper and firmer appearance. The intensyl also promotes lifting and firming within 30 minutes of use. You can use this as an intense mask where you apply a generous amount over the face and neck and leave for ten minutes before rinsing of with warm water or you can use it as an intense overnight mask where you apply a thinner layer to the face and neck before rinsing of in the morning. I prefer to use this as intense treatment mask, although I have used it as an overnight treatment also, I like the idea of being able to see the benefits of the mask straight away. When applying this mask, it felt cooling and refreshing, however after the 5/6th minute you could definitely feel a tingling sensation, nothing unpleasant just a gentle tingle. When I rinsed the mask off, my skin instantly looked refreshed. Now at the age of 26 I am lucky enough to not have any fine lines or wrinkles, however I did feel my skin was firmer, plumper and hydrated, It felt smoother and instantly softer. When applying my moisturiser I could really tell that the mask had worked. I also noticed that after I have used this product, my make up sat nicely, it helped my primer to really give a even starting ground for the mask up to be applied too. This mask gets a sold 9/10 for me only slightly missing top marks for the fact that I have youthful skin and although it has many benefits to me, I would highly recommend to more mature skin as I think that's when you would get to see how well this mask truly works. Do you have any mask recommendations? Have you tried this treatment , let me know down below in the comment section. Until Next Time, Kayleigh 💕 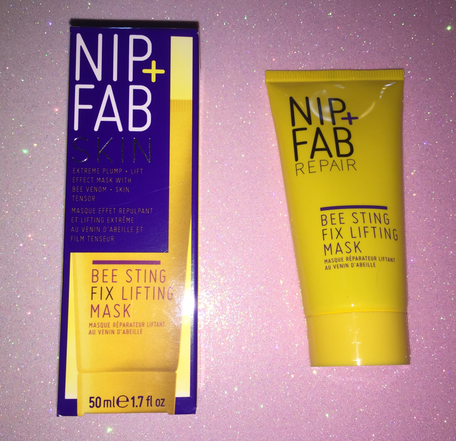 |

Archives
June 2019
|